Showing posts with label projects. Show all posts

Wednesday, October 3, 2012

Art Journal Update

I'm beyond due for a journal update so here it is! These are just pictures of the pages in my art journal since I last updated about my journal. I was going to do a youtube flip and I still might but wanted to go ahead and put them on here and maybe say a few things about what I did on each of them. Warning, Long post!
Descriptions are underneath each. If you have a question about a page, leave a comment! 

 This one is very simple, I was mostly testing out new stamps. I don't think it is complete yet. I just don't know what it needs. The stamps are from different groups, but most if not all are from The Paper Studio I believe.
 This one I did during church. It was inspired by the last song played. All done in sharpie.


 These two are the cover of my first art journal. Unfinished but haven't had time to add anything yet.
I used a combination of brown, antique gold and ivory acrylic paints, some fun scrapbook pages that i tore and inked with Distress Ink in Vintage Photo. And used some more stamps by The Paper Studio.

 I did this one with oil pastels and water. Then I added some graph lines with an ink pen and a white pencil to detail. I used torn pieces of scrap scapbook paper and edged them with brown oil pastel and used my finger to blend. I drew the little girl and used color pencils and sharpie to color her in. The words I did in sharpie as well. The white stars I did with a stencil and gesso. There is a heart doodle that I also did in ink.
 This page was one from an old sketch book. It was over a page with chalk on it and it had transferred to this one. So I glued it in and drew the trees with a Faber Castell Artist Pitt Brush Pen. The saying is a stamp, and the bird is a stamp. I can't remember what set these two came from but they were together.
 This one was done with watered down acrylic paints and a stencil for the swirls. The black is just sharpie. The fleur-da-lee (sp?) is a stamp from Paper Studio (I got a huge hall from Tuesday Mornings, I got like seven sets of their clear stamps cheap)

 This one is a collage piece. I used lots of paper from magazines and cut up thank you cards. Then I gessoed over it to tone down the color. I used a flower stamp I got from WalMart for a dollar. The girl is made from a napkin that I cut out and glued on the page and then drew her-painted it with acrylics. I want to add a quote but haven't come up with one yet.

 This page is one I dislike but hey, this is how you learn and you shouldn't be afraid to dislike what you create. I used polka dotted tissue paper and collaged it over some thicker letters (raised sticker letters) The phrase says life is an adventure you must explore. To make them show up after I covered them I used an black ink pad and rubbed it over the letters. Then I was trying to stay with a circle theme and used buttons to make a flower/firework thing. I used bubble wrap as a stamp with paint. And added a stamp or two. It's just really chaotic- like life- and I'm not sure I like it.
 I was practicing image transfers here. I took a magazine add for a purse because I liked the harlequin pattern on it. So I spread some matte medium on the page and put the magazine page on it and let it dry. Then I used water and sprayed it liberally on the page and used my fingers to rub off the magazine paper. It took forever and was really messy. This book only worked because it has really thick, canvas board like paper in it, otherwise I think it would have torn to pieces. Then once the paper was rubbed off I had a nice image on my page. I used alcohol inks to color and added a script stamp for extra interest. I doodled curvy S's along the border in black sharpie.

 This one I used pink ink in white gesso to tint the page then used blue denium alcohol ink for the two corners. I used a script stamp in sepia toned ink for background. The stamps are two different sets. One's the bird set I can't remember and the dots and chains are from a background set. The ink spill was done on purpose I just dripped some ink on there and tilted the page. The phrase says "Know you are beautiful" The word beautiful is a rub on. I think I dislike rub ons lol. I'm rubbish at them. ( haha)
There are some flowers in the blue bottom corner that are rub ons as well. The hearts are a stamp.
 This is from the journal I made, I used stickers and scrapbook paper for my name and some Prima flowers with button brads on the coffee sleeve page. The little page above it is just me practicing with ink spills. The background is sprayed acrylic paint.

 This one I used spray acrylic paint in blue and inked over punchinella (sequin waste) for the black dots. I colored a paper doiley in alcohol ink. And then used a stamp for the saying. I also used a yellow acrylic spray with the punchinella for the yellow dots in the center of the doiley.
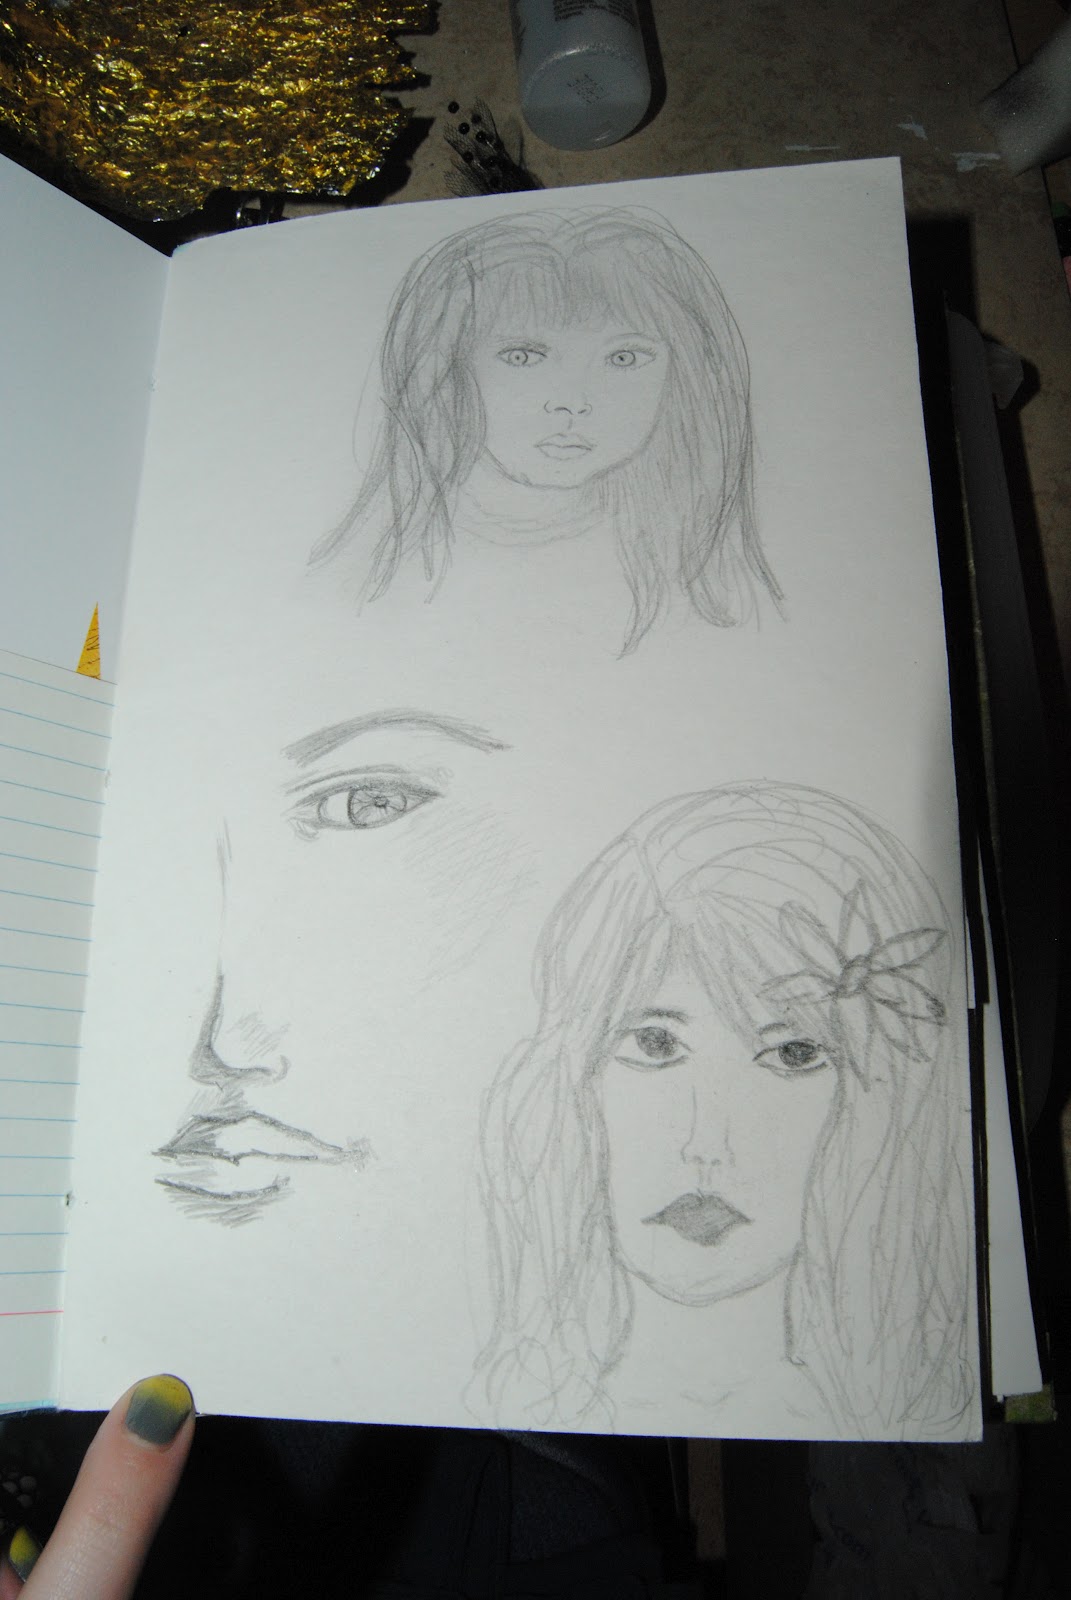
 Practicing sketching faces here.

This was a piece of acrylic paper from a pad that I painted and then sprayed it with water and crumbled it over and over to break up the page then used white paint and a stamp. I'll out a quote on it later I'm sure.

Well that's it for the journal update.

I have some projects I will post at a later date as none of them are complete yet. :) Have fun creating!

Friday, June 22, 2012

Project Catch Up

I guess Mother's Day was my launch into my new 'art era'. It was around then that I discovered mixed media and altered art. So to catch this blog up to date, I thought I'd post the few projects that I've done so far and describe a little about them! After this, I'll do one project per post (with before and after pictures if needed) as I finish them.

First project was for my mom on a stretched canvas. It was a 12x12 I believe.


I painted it red with some spots of mixed in black and white paint. Then with a fan brush dipped in silver I made 'scratch' like strokes. All paint is Folk Art brand acrylic, the cheap stuff from Wal-Mart. Once that dried I used my X-acto knife to cut out petal shapes, then took some left over ribbon bits that I had from a different project and glued them on the back of the canvas to show through. I added a circle cut out of striped paper from an old thank you card and hot glued an old button on top for the center. The other flower I took some paper from  DCWV's La Creme Matstack (4.5 x 6.4 stack) and cut out petal shapes. I hand sewed those on with black thread and glued a circle cut out from a page in a scrapbook kit from The Paper Studio's Imagine If Scrapbook Kit for its center. The bottom picture is one I found through google and printed out. For the color tinting, I wanted to try and do a 'stain' but I don't currently have ink. I used a bronze metallic ink and made a wash of it by simply adding water then brushed it over. The two side frames are stickers from the same scrapbook set. I did the same wash process with the little note (it's hand written excerpts from Proverbs 31) and the small picture at the top. Both of those items I also burned the edges.

~ ~ ~ ~


Second Project was my candelabra thingy. (Don't know what else to call it) It was a bronze metal with yello glass beads and yellow votive glasses for tea lights. I didn't like the yellow, it looked more like the stain from smoking. So I took some glue and mixed it with water to make my own version of mod podge. I took an old dictionary and tore some pieces up. I did happen to have Tim Holtz' Distress Ink Pad in Victorian Velvet and used it on the edges. ( It was my first purchase after gesso when I first got into this whole adventure) Then I used my glue mixture to put them on. I also painted the little glass beads white and the stand itself black. 

~ ~ ~ ~


This project was my version on the captured fairies I saw so much of, but I wanted to do a butterfly. So I did. :) I had some old stationary that had butterflies in the corner. I cut two of them out and pasted them on both sides of homemade chipboard (cereal box ;) ). I then Gloss Accented it and bent it slightly to make it look like it was flying. The jar was an old candle jar that I cleaned out. I used ribbon scraps and beads for the inside, just hot gluing them down in places. Sadly, some of the glue shows but oh well. The back is covered in blue tissue paper, (mod podged). The butterfly is just set in there, I didn't attach it. I then used a bunch of ribbon scraps around the lid with a tassle and a couple of old buttons. There are some sprigs of little white flowers I took from a fake lei inside the jar as well as with the ribbon scraps.  All hot glued on. 

~ ~ ~ ~


This is for my dad, obvisouly, for Father's day. I used green and blue acrylic paint washes (meaning paint and water) and splashed it on in layers on a canvas board. It took about three layers to coat. I then took an old granola bar box and cut out the letters for dad. I pasted them on then used the paint washes over them to make them blend it. To make them stand out just a little, I dabbed my finger into black acrylic paint and brushed my finger over the edges making an outline. I used an old tomato paste can, dipped it in black and gold acrylic paint to make the circles. The bottom left corner has some old copper speaker wire shaped into the word father glued down with some Glossy Accents. I also brushed over some black acrylic paint to make it not so shiny. The bottom left is a silver chain I had lying around. I just used Glossy Accents and glued it down in a sort of flourish. Black acrylic was also used to grunge it up a bit.  The dice were left over from a game that is missing lots of pieces. They are red, and I dabbed some gold metalic acrylic paint on them. With the end of a paint brush I dabbed the holes with black to help the numbers stand out. The tie is a very old tie of my dad's. He loves Bugs Bunny. He also loves coffee and is a bit of a clutz. So this tie had some coffee stains on it and he hadn't worn it in ages. But he never got rid of it. I sprayed it with some glitter mist in Copper from ART-C and sprayed the tie to grunge it up so the coffee stains wouldn't stand out. Then I tied it and hot glued it to the canvas. This way he could keep it and dispay it.

That about does it for now. I know this was probably an overload of projects at once but mostly this was just catch up. If you read the whole thing, then thanks! 

My next post will be about my new art journal. :) Have a great day and go create!